Showing posts with label DIY. Show all posts

Wednesday, 13 January 2016

DIY Gummy Bear Popsicles


It's Summertime here in Australia and the weather is scorching hot, so I think these Popsicles are the perfect refreshment. They are extremely easy to make and are my favourite treat by far. 


You will need:
- Drink(s) of your choice ( I'm using Sprite and Fanta)
- Popsicle moulds 
- Gummy bears


1. Half-fill each of the Popsicle moulds with your choice of drink.


2. Add a couple of gummy bears and then keep in the freezer to set.


3. After about 1 hour, take the Popsicle moulds out of the freezer. Then fill the remainder of each mould with the drink(s) and add more gummy bears.


4. Leave in the freezer to set.


You now have your very own gummy bear popsicles, sure to be a crowd pleaser!
xx, Tanisha


Tuesday, 15 December 2015

DIY Pin-Up Board

Pin up boards are reeeeeally common and really pretty (not to mention useful). But there is always something wrong with the one I buy, whether it's the thickness or the frame. So I decided to come up with a plan to make one myself. (I haven't actually made this yet but it should work).

What to buy:

-A piece of soft wood (the size of this determines the size of the whole board)
- Scraps of wood to frame 
- A piece of cork the size of the soft wood OR A thick fabric (choose a nicely patterned one!)
- Ribbons
- Hot glue gun and glue sticks / Superglue
- Hooks (the ones for picture frames)

How to make it:

1. Gather all your materials and plug in your hot glue gun (if you choose to use hot glue).

2. Cut and size the cork, soft wood and/or the fabric if it is not the same size as each other. Remember to cut the wood for the frame the same sizes as the one parallel to it.

3. Glue them all into place. (the frame on the cork or fabric on the cork).

4. Wait for it to dry and add any decorations if you want to.

5. Using a drill or screws, put the hooks behind the pin-up board.

6. Hang it up with some ribbon and you're done!

XX, Jas

Friday, 11 December 2015

DIY Percy Jackson Blue Pancakes

When I was younger, I used to read the Percy Jackson series. One thing that I remember clearly were the blue foods that Percy's mum used to make. 

So here is my own version of her pancakes.

**this recipe make 

Ingredients:

-Self Raising Flour
Milk 
-Blue Food Colouring (you can use as much as you want, but the more you use the bluer it    will be)
-Belgian dark chocolate buttons (any chocolate chip/button will do, and use as much as you  want)
-1 tsp vanilla essence  
-Cooking oil (any type will do, I used Rice Bran Oil with the spray can)

How to prepare:

1. Sieve your flour into a large bowl. 

2. Add the milk and vanilla into the bowl. whisk until it becomes a creamy colour. 

3. Mix in your food colouring ( the shade you end up with will look close to a Tiffany or Baby     Blue)

5. Add in your chocolate buttons (If they are slightly larger, cut into quarters).

How to cook:

1. Spray/ Add a little bit of oil to your pan.

2. Pour a reasonably sized amount to your pan.

3. Cook until you can see the sides of the pancake change to a darker shade and 'bubbles' appear in the pancake.

4. Get your spatula under the pancake and flip carefully (if you are a bit afraid of this step, get an adult to do it).

5. Stack them up and repeat.

6. Serve and enjoy!


Serving tips
- Chop up some bananas, strawberries, blueberries or any other type of fruit.
- Melt up some more of the chocolate you are using to drizzle over the pancakes.
- Enjoy whilst hot! (The chocolate will be all gooey and delicious).


xx, Jas

Monday, 7 December 2015

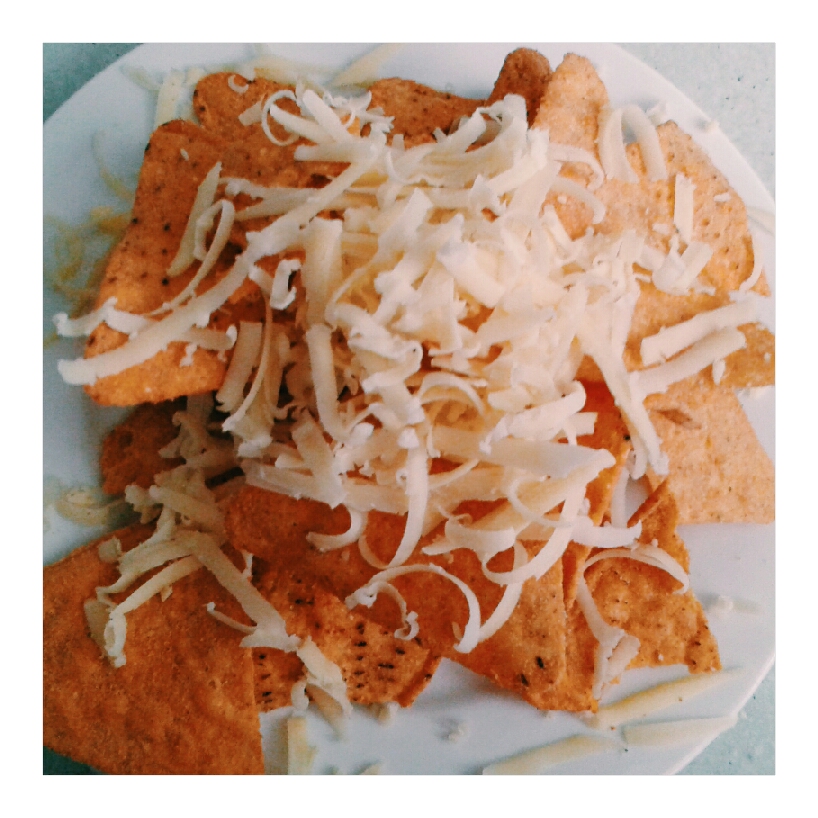
DIY Nachos + Salsa

Hi there and welcome to Ukiyos latest blog post! Today I will be showing you guys a quick recipe/ tutorial for how to make Nachos with Salsa. Nachos are one of my favourite foods, so I hope that you enjoy these nachos as much as I do! Enjoy:)

Ingredients (To make about 3- 4 servings)
- About 250g of Corn Chips (It doesn't matter what brand or flavour you use, but for this recipe I will be using Mission brand Extreme Cheese)
- Grated Cheese (Again, it doesn't matter what type of cheese you use)

For the Salsa you will need:
-250 g tomatoes, diced; you can always use more of you feel this isn't enough
- 1/2- 1 tablespoon tomato sauce
- 1/2- 1 tablespoon olive oil
- 1/2 chilli, finely diced
-1/2 Small green capsicum, finely diced

Recipe:
1. Take a handful of corn chips from the packet and place on a plate
2. Then take a handful of grated cheese and place on top of the corn chips.


3. Microwave for 20 to 30 seconds.
4. Put the nachos aside for now, and get the salsa ingredients ready.
5. Add the oil to a sauce pan and then the capsicum.Stir for about 2 minutes, then stir in the tomato and tomato sauce, and then bring the mixture to boil.
6. Reduce the heat to medium- low. Simmer, uncovered, for about 15 minutes and then wait for the salsa to cool completely. 

Put the salsa onto the nachos, and enjoy πŸ˜ŠπŸ˜‹
- EliseπŸ’•

Sunday, 29 November 2015

Nutella Mug Cake

Ok, so i'm pretty sure that everyone loves nutella. Nutella goes with anything, or just by itself. But sometimes it's good to experiment and change it up a little. This mug cake is simple and easy and it doesn't require many ingredients. It's also big enough for two - depending on how much you love cake. 

Ingredients 
- 4 tbsp Self Raising Flour
- 3 tbsp White Sugar
- 1 Egg, Beaten until fluffy
- 2 or 3 tbsp Nutella (depends on your preferences) 
- 3 tbsp Milk
- 2 tbsp Cocoa Powder (optional)

Equipment
- (large) Mug
- fork/whisk/whatever you use to whisk stuff
- measuring cups

Method
1. Mix all the dry ingredients together in a mug. in a separate bowl, mix all the wet ingredients. Do not add in the Nutella yet.

2. Add the wet mixture to the dry mix in the mug. make sure that everything is blended properly and that there are no lumps of flour.

3. Add the nutella. This might take a while as the nutella will stick everywhere.

4. Microwave for 1.50 - 3 minutes. the time of microwaving may vary from different microwaves. I recommend that you start with 1 min 20 sec and if it is not done then microwave for another 15 seconds. Keep repeating this process till done.

You can eat the cake plain or add whipped cream or ice cream if you want. Enjoy!

xx, Yi Xin


Friday, 27 November 2015

DIY Hair Bows

Sometimes you want to find the perfect accessory, maybe something to go with your outfit or something to compliment your nails or whatever. But finding that something can be a little frustrating. I find it easier to just DIY.

Materials
 - whatever fabric you like (I find it easier to use cotton based fabric) 
- some sewing thread  
- a small needle

Instructions
1. Cut a piece of your fabric twice the width of your bow. What that means is that if I wanted a bow approximately 8 cm x 4 cm, I would cut a rectangle of 8 cm x 8 cm2. Fold your fabric in half width wise and stitch along the edge of the fabric. Make sure that you at least have a seam of 1 cm. Also be sure that you sew the seam on the opposite side of the fabric that you want to use.


The fabric doesn't have to be perfectly aligned, as it should be stitched together in a straight line


3.  Now turn the fabric inside out so that the stitches are hidden. Flatten the fabric so that the seam is in the middle. 


4. Turn in the raw edges so that it looks clean. Stitch close to the edge, preferably using a complimentary thread. do this to both sides


This is what the 'bow' should look like after the edges has been turned in


5. Fold the bow accordion style to create the bow tie folded effect.


6. (This is where a sewing machine would come in handy). Sew all the folds together from top to bottom. if you have a sewing machine, just place the bow under the foot and you can stitch it like so.


7. Cut a small strip of either the same fabric or a contrasting one, and wrap it around the center of the bow. It's a lot easier to just use super glue or something similar to hold it together. If you do this, it just makes it easier to attach a bobby pin or hair clip. 


And there you have it! This design is totally flexible so you can make many alterations if you need to. 


xx, yi xin

Wednesday, 25 November 2015

DIY Clay Pendants

So, one day, I was messing around with clay and made a little heart.

 I wanted to make this moment a memory so I baked it when I went home. 

These are the instructions on how to do it, if you've never done it before.


  1. Mold your clay: you can buy these fancy clay shapers but my own personal pref,  is hand-shaped things because it gives it a more authentic feel.
  2. Poke a hole: you can put it in the top, side, middle- wherever you want, but keep in mind it has to work as a pendant on a necklace.
  3. Bake it: you can pop it in the oven with your food if you are sure there aren't any toxic fumes but I like to be safe and bake them by themselves. Use under 130 degrees Celsius and it will bake pretty well. (if you check that you were actually using clay and not plasticine. Been there, done that.)
  4. Glaze it: You can buy expensive glaze if you want it to look REALLY pro, but clear nail varnish worked for me too. Some top coats can go dull after a while so I just top them up with an extra layer.

Last but not least, can I just PLEASE stress AGAIN, how important it is to check that your clay is oven-safe and isn't air-dry. (Again, trial and error, guys)